
This Picture Tutorial is intended to Instruct those who have had their (Top Mounted or Floating Types) Floyd Rose type Tremolos Setup by a Tech and want to fit a fresh set of Strings. Other issues such as “Trem Tilt”, Intonation or any other Issues that you are not confident adjusting can be adjusted by a Tech/Repair Shop.
Be warned that adjusting a Floyd Rose Bridge can be INSANELY FRUSTRATING for the new enthusiast – every adjustment you make needs accurate retuning many times and other adjustments elsewhere – if in doubt about your trem system setup you should take it to a Tech/Repair Shop that is experienced with their Floyd Rose Setups.
PLEASE NOTE – to keep your Floyd Rose Tremolo System working correctly YOU MUST USE THE SAME BRAND AND GAUGE STRINGS THAT THE INSTRUMENT WAS SETUP WITH. Different brands have different tensions of a few pounds difference, and that small difference will throw previous Setup/Tech Adjustments out noticeably. If in doubt take it to your Tech with a fresh set of 9-42 Gauge Strings that you are going to consistently use on your Floyd Rose equipped Guitar.
**************************************** IMPORTANT ***************************************
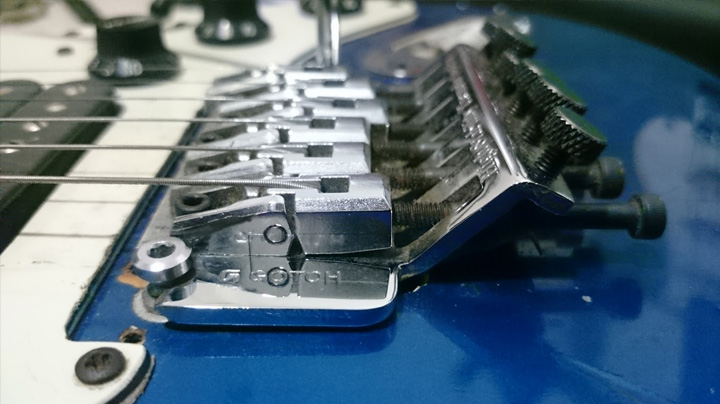
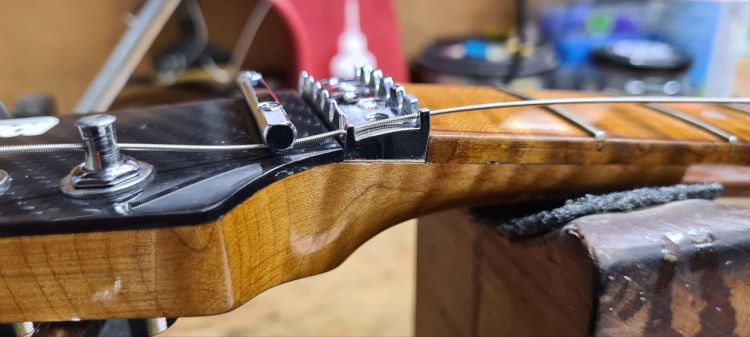
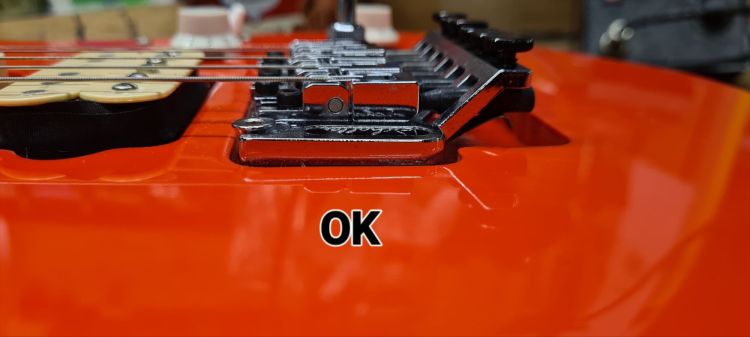
REMEMBER TO USE ONLY 9-42 GAUGE Strings at Concert Pitch on a Floyd Rose Equipped Instrument, Larger Size Strings at Concert Pitch will wreck your Guitar from the extra Tension leaning the Trem Posts forward… Just like the Picture below…. Notice the Post has tipped forward and if you look closely, you will see the 10-46 Strings have leant the trem post forward and cracked the wood into the Pickup Cavity! (It’s an expensive repair to fix this type of damage and unfortunately we see older guitars in the Workshop like this often….)

***********************************************************************************************
If you have read this far and you still want to do this yourself? Then read on …
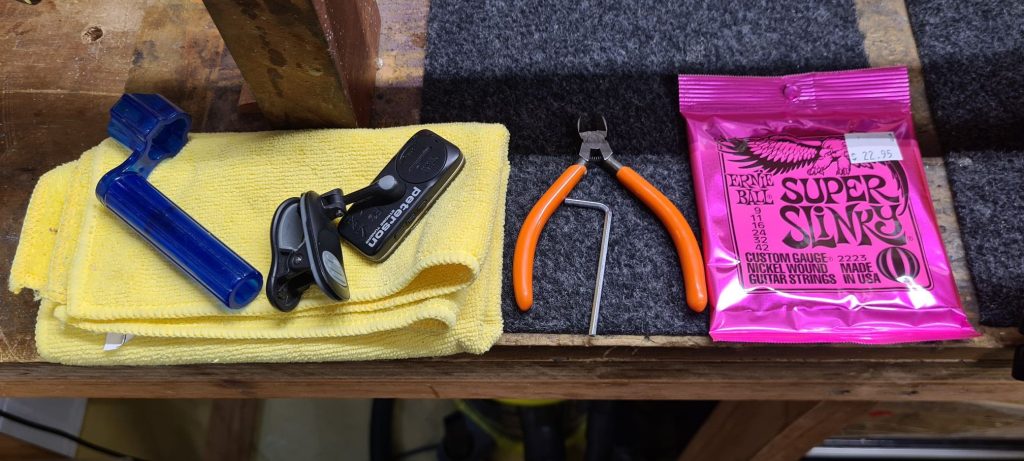
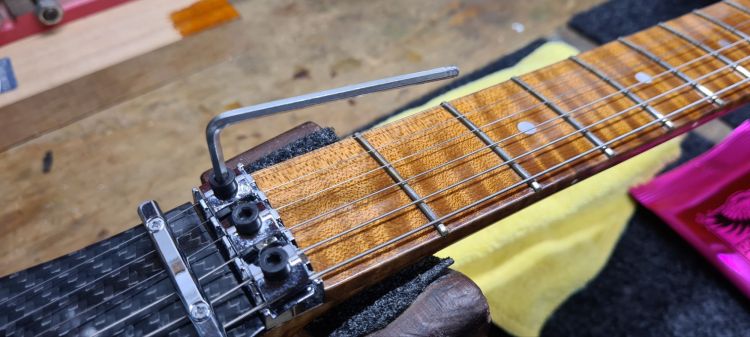
Step 1 – Gather together your Preferred Brand of 9-42 Gauge Strings, Some Cutters, a 3mm Allen Key Tool, A Guitar Tuner (Clip-On Type Tuners are great!) Fingerboard Cloth and a Polish Rag ready before you start this task.
Step 2 – Find an uncluttered, flat and level surface to sit your Guitar on….. a kitchen bench at dinnertime is perfect!

Step 3 – Cradle the neck with a rolled up towel or something similar. (Something soft so that it doesn’t dent the back of the neck!)
Step 4 – Insert/Lock the Tremolo Bar into the Bridge.
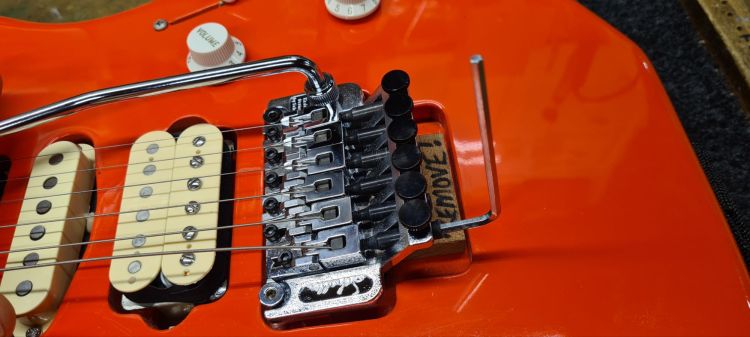
Skip this next step if your guitar has a top mounted tremolo system (the trem system is not recessed into the body but is mounted to the top instead – it only allows downward movement) see pic below…..
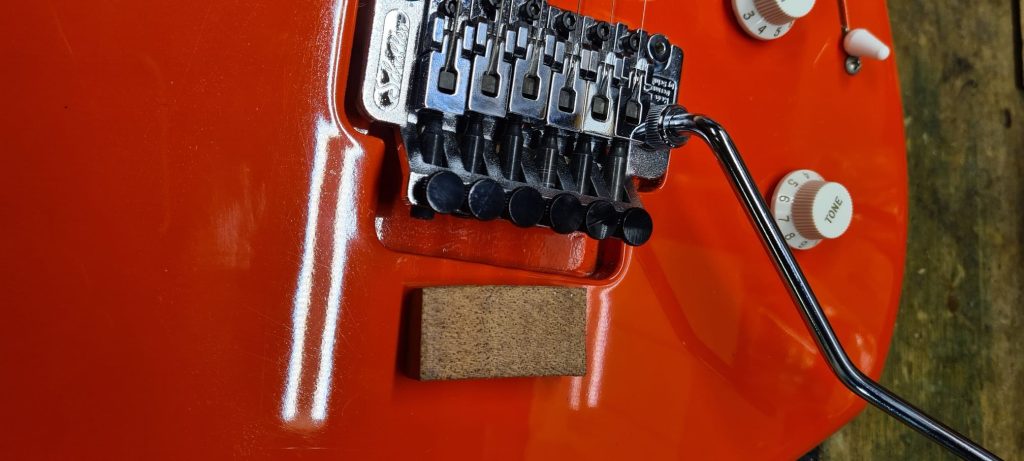
Step 5 – Push down on the Bar and Slide an eraser or small flat block of wood underneath the back of the Bridge to keep it close to level while the strings are off. I like mine just under level so that the trem just lifts off the block it as the guitar gets tuned to correct pitch.
Step 6 – Unlock and remove the 3 String Clamps at the Locknut, put them aside in a safe place (a small plastic jar or similar)
Step 7 – Detune The String at the Tuning Peg
Step 8 – After the String is Slackened – Tilt the Trem System forward and Unlock the String at the Saddle
Step 9 – Carefully Remove the String and Make Sure the Saddle Lock Block doesn’t fall out of the Saddle. **Be EXTRA careful not to move or disturb your Guitar so the “Lock Blocks” do not fall out and get lost** You would be amazed how many hours people spend on their floor searching for fallen out lock blocks!
Step 10 – Repeat from Steps 7, 8 and 9 for each string until they are all removed.

Step 11 – Let the Trem sit on the Block you have inserted into the Trem Cavity, Do not remove it until you are all tuned up.
Step 12 – Clean your FIngerboard if it is Dirty.
Step 13 – Polish your Guitar Finish if you want to.
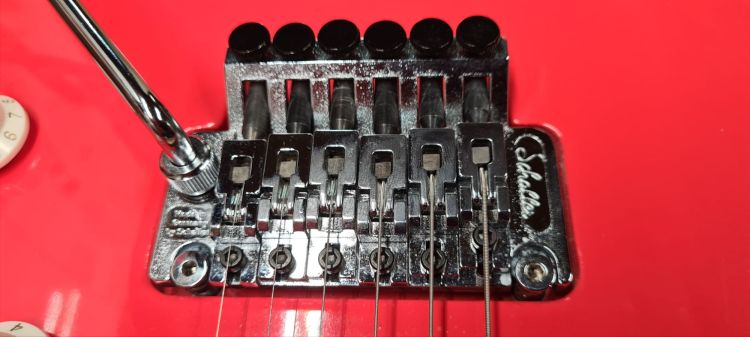
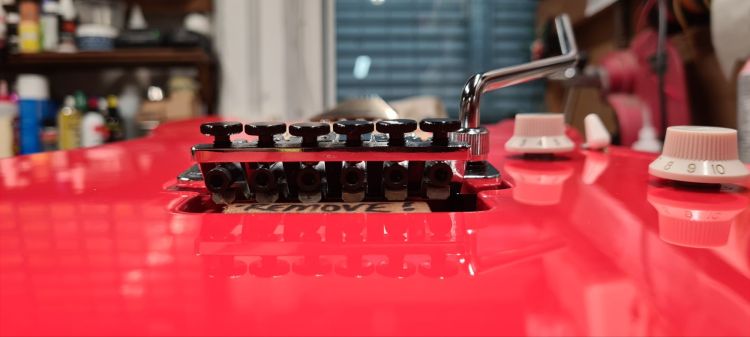
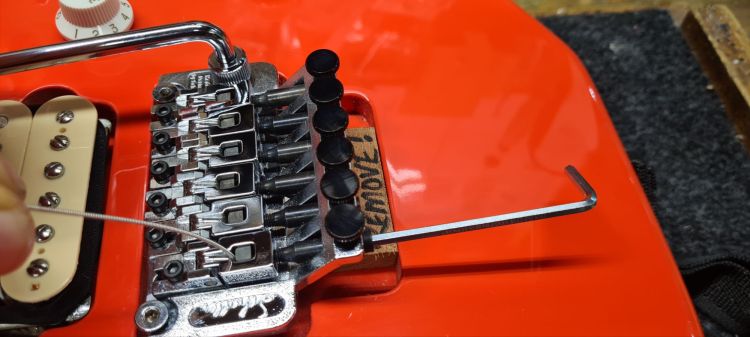
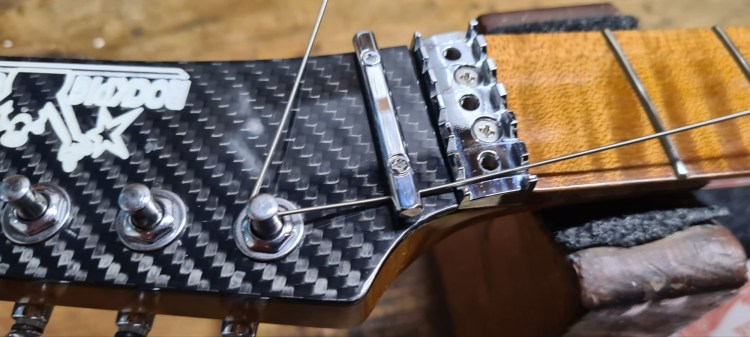
Step 14 – Adjust your Fine Tuners into a pattern similar to this picture, I leave more adjustment for the High E and B Strings as they stretch more when being bent – it means I won’t have to unclamp the Locknut to get more adjustment over the life of this string set.
*********************************IMPORTANT **************************
REMEMBER TO USE ONLY 9-42 GAUGE Strings at Concert Pitch on a Floyd Rose Equipped Instrument, Larger Size Strings at Concert Pitch will wreck your Guitar from the extra Tension leaning the Trem Posts forward.
Step 15 – Get your strings out of the packet and ready to rock… \m/

Step 16 – Cut the Ball End off the String close to where the wrap ends.
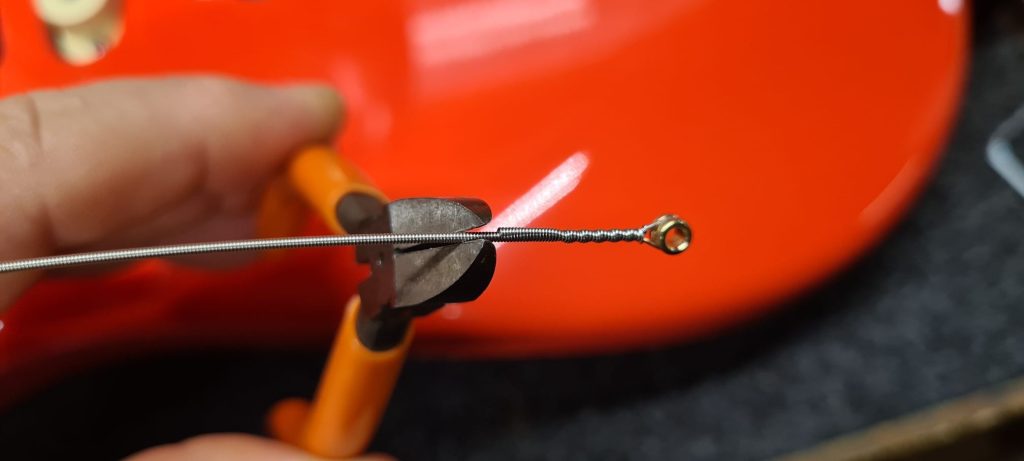
Before we go any further I need to explain that with using an Allen Key, I always UNLOCK bolts with the LONG Section of the Allen Key and TIGHTEN things using the SHORT Section of the Allen Key – Otherwise you run the risk of Over Tightening and Stripping Threads on Your Floyd Rose Locknut and Tremolo Bridge,
Remember this saying – “Lefty Loosie – Righty Tighty” if we translate this saying it instructs you to “Turn the wrench ANTI – CLOCKWISE TO LOOSEN” and gently “Turn the Wrench CLOCKWISE TO TIGHTEN”

Be Sure to only TIGHTEN the Saddle Bolts and Locking Nut Clamps to where the Allen Key stops turning, DO NOT “FORCE” or “CRANK” the Bolts or you can potentially Crack the Saddles or Strip the Threads out on your Saddles and Locknut, For the system to work correctly they Saddles and Locknut will need to be replaced if they are Broken or Threads are Stripped.
Continuing on…
Step 17 – With your Left Hand – Insert the String End down into the front of the saddle in front of the Lock Block, With the same hand – Tilt the Bridge forward with the Bar and “Gently” Lock the String into Place in the Centre with your 3mm Hex Key,
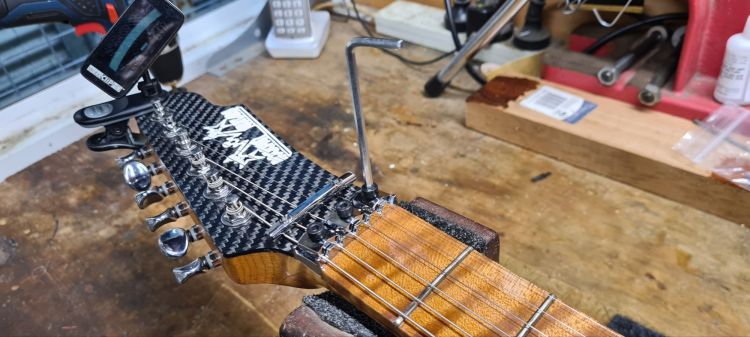
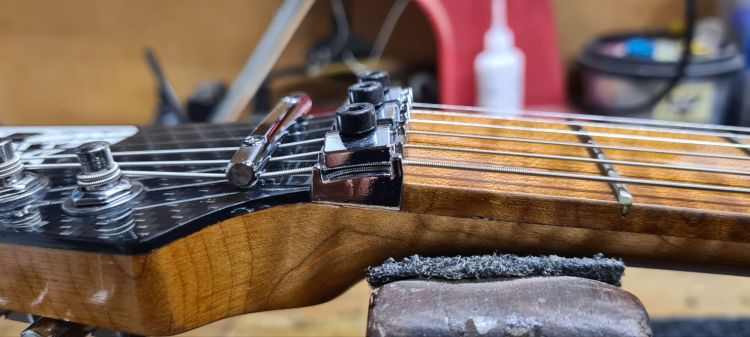
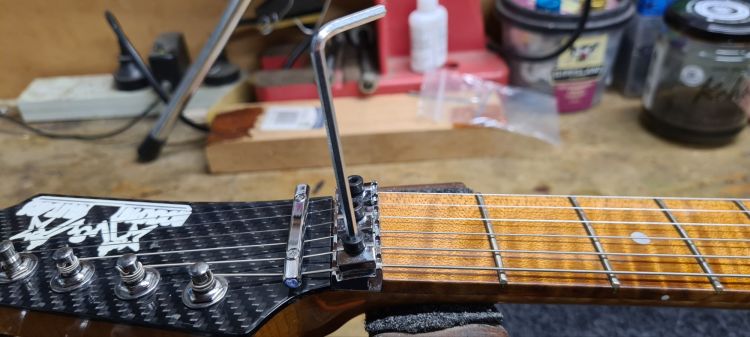
STep 18 – Run the other end of the String up over the Locknut and under the Retainer Bar and through the Tuner Post Hole.
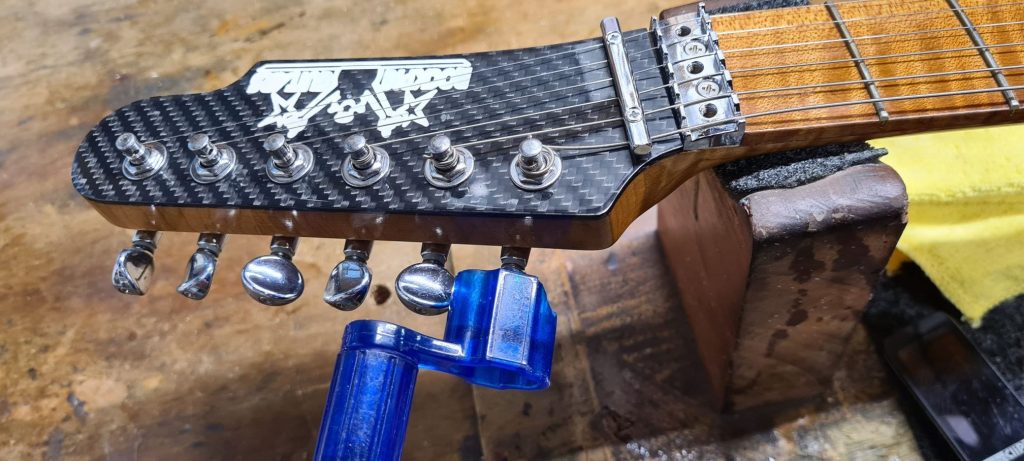
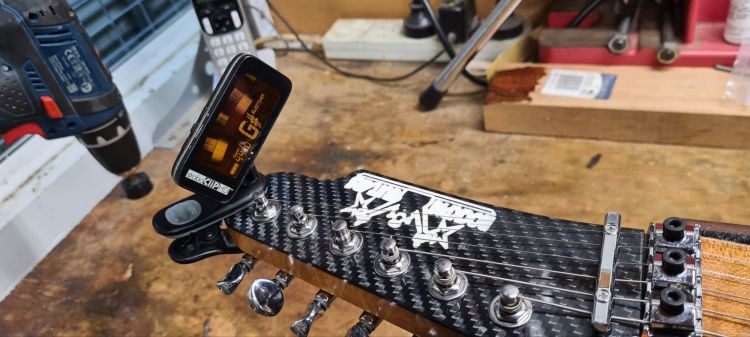
Step 19 – Clip your Tuner onto the Headstock out of the way.
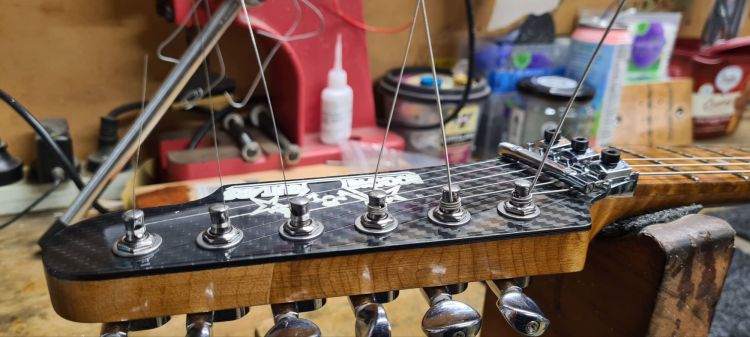
Step 20 – Measure 2 Tuning Posts distance, Bend the String and Wind it neatly down the post, Be sure not to wind it too tight, Tune the String to pitch, Give it a little stretch and tune to pitch again.

Step 21 – Rinse and Repeat x 6
Step 22 – Clip your string ends and gently install your Lock Nut Blocks onto the Locknut, do not tighten them but just keep them loose enough for fine tuning before you lock them down.
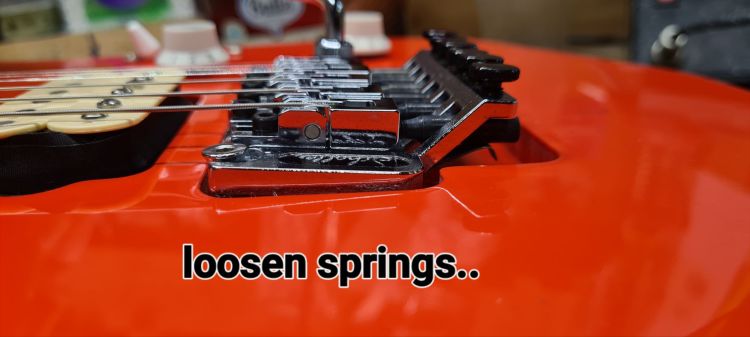
Step 23 – Let’s say you have installed and tuned up your new Strings and your Floating Floyd Rose Bridge has tilted Up or Down, you can adjust the Springs in the Trem Cavity to get your Trem Baseplate close to parallel to the top of your Guitar. Adjust at your own risk and be warned you will tune the guitar many many times to get this adjustment close…. don’t obsess over this adjustment, just get it close.

Step 24 – You will need to Stretch and Retune your Strings a few more times to get them staying in tune and ready for locking down.
************************************* PRO TIP *************************************** “Pro Tip # 1” – Tune Your Freshly Strung Guitar up to Concert Pitch, then Tune the A, G and E Strings just a tiny bit Sharper before you lock the clamps down (after stretching step 24) The Lock Nut Clamps always flatten the tuning on those Strings a little. ***************************************************************************************
Step 25 – Gently Tighten down your Lock Nut Clamps. Remember just Snug it down until the Allen Wrench stops turning, We are locking down 9-42 Gauge Strings NOT changing Truck Tyres!!
Step 26 – Fine Tune everything from the Bridge End once you have Locked Down your Lock Nut Clamps.

You should now be Ready to ROCK…. \m/ \m/
Once you have done this a few times it becomes quicker and easier!
If you got this far – give yourself a pat on the back, now plug in and enjoy the superior tuning stability of the best trem system ever invented!!
********************************************************************************************
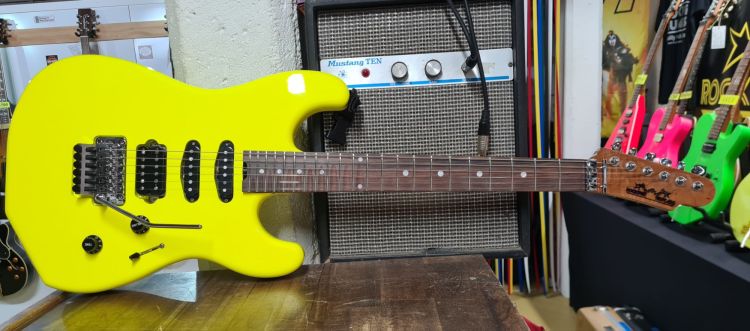
**The Guitar in these pictures is my personal Rockpig “Sniper Classic #RSCF1437” and now it is ready for gigs this weekend! Hooray!! I alternate between 2 of these Sniper Classics (Fiesta Red HSH and Fluoro Yellow HSS) as they are versatile and fantastic for anyone who is tired of the same sound all night! These Guitars are the most fun you can have with your clothes on!!

************************************* PRO TIP ***************************************
Pro Tip # 2 – If you are a Performing Musician, you will know that being reliable is important – no matter what type of Guitar you play – you should consider taking a spare Guitar (with Fresh Strings fitted) to your gigs just in case you break a string or something else malfunctions on your main guitar….
**************************************************************************************
